 Wait! Before you put that grill away for the winter, there's still time for one last cookout isn't there? Yes! By golly, while the sun still shines, it's as good an excuse as any to burn some charcoal.
This is our last, but hopefully not, effort on the the grill. It's getting almost too cold and too dark to cook outside for dinner now, but if you get home early enough and plan ahead, this still might be possible. You'll have to try this one. First, use thighs because I just think they have more flavor and tend to be more moist. These are the skinless and boneless types. They were really good, paired up with some potato salad and the last of the zucchini squash from the garden. The flavor that carries this dish though is the sauce. You'll have to try it out.
Here is the recipe for this grilled chicken and peanut BBQ sauce.
Visit our new blogs:
Amoores.com
Cooked from the Heart - our new food blog
Our New Backyard - garden & photo blog
Found Not Lost - about all the things we 'find' worth talking about
 Hey, it's summer again and I don't have to tell you what that means. It means it's time to grill! Yep, our grill has has been doing some overtime since the weather got hotter. One of the things the girls love grilled is what they call barbeque on the stick. They'll eat anything that you pierce with a stick and throw on the fire. :)
These were chicken thighs which were marinated in soy sauce and mirin, with a touch of sugar and peppers. They were delicious!
I haven't gotten around to typing up the exact recipe yet. I truly meant to do that this week but I just hadn't gotten around to it yet. Keep checking Cooked From the Heart, I will be posting the recipe soon. Maybe this weekend.
Visit our new blogs:
Amoores.com
Cooked from the Heart - our new food blog
Our New Backyard - garden & photo blog
Found Not Lost - about all the things we 'find' worth talking about
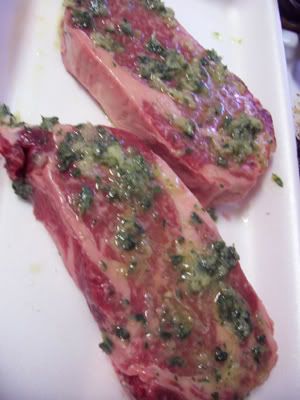
This happens to me all the time. I start taking pictures of a dish then when it comes to the final photo, I forget because I'm too busy stuffing my face! That's what happened with these steaks. They were delicious and grilled just right, medium rare.
While the grill is setting up, marinate a couple of steaks (ribeyes in this case) in some chopped garlic, parsley, sage and thyme; juice from half a lemon, two tablespoons of olive oil and season with kosher salt and freshly cracked pepper. Grill over medium hot coals until medium well, about seven minutes each side.
Serve with your choice of sides. Ours was served with baked potatoes and cucumber & tomato salad from the garden.
src="http://pagead2.googlesyndication.com/pagead/show_ads.js">
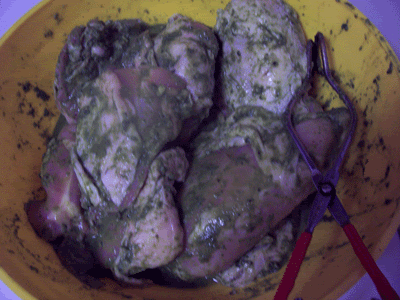 Oh it's grilling time again, and if you're blessed with lots of basil from your garden, it's probably pesto time also. We have been blessed with pesto for the second year in a row but as much as I love it, we just can't eat enough pasta and pesto to use it up. So we've been giving it away and using it up for other dishes like this grilled chicken marinated in pesto.
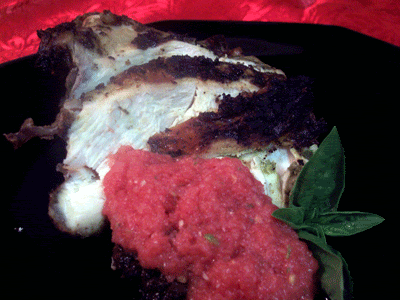
This is a very simple recipe. Just marinade the chicken pieces in pesto sauce for 30 minutes to overnight and grill.
If you missed the pesto sauce recipe I use the first time, here it is again.
2 Cloves of fresh garlic
3 cups of fresh basil leaves, stems removed
1/2 cup of pine nuts
1/2 cup of grated parmesan cheese
1/2 cup of olive oil
In a blender, blend the above ingredients together until smooth. Done!
COOKING TIP:
From experience, I found that this sauce will last in the refrigerator for two to three weeks stored in an airtight container. You can also freeze this sauce and use it to flavor anything that requires a basil flavor. You can freeze small amounts for sauces in an ice cube tray then after they harden, transfer the cubes in a ziplocked freezer bag. It is best to freeze them in portions that you will need so you won't have to defrost the bags before using.
If you are making a batch specifically for freezing, you can omit the parmesan cheese and pinenuts and add those fresh later when you are ready to use the basil.
 It is time for Lasang Pinoy again, and for this 18th round our host is Toni of Wifely Steps who chose this month's theme of vegetables! Whether you love them or hate them, we will be writing about Filipino or Filipino inspired vegetable dishes.
In Our Kitchen, vegetables are a no brainer. Any will do, cooked or not, in any which way. I think our favorite way though is AS IS, vegetables that are as close to their natural flavors as possible; that is why salads, simply dressed are so popular at our table.
Here are some 'close-to-traditional' (since I don't ever do anything the authentic way) vegetable dishes that have been published on this blog previously.
Vegetable Adobo
Pinakbet Tagalog
Ampalaya (bittermelon) with Eggs
Kamote Salad
Gising-Gising
Ginisang Sayote
These are variations on the theme or Filipino 'inspired' dishes:
Steamed Garden Vegetables The simplest way of cooking, and also the best way to bring out natural flavors of vegetables.
Green Beans, Tomato & Cilantro Salad
Green Beans with Lemon and Soy Sauce
Shrimp & Vegetables Sinigang sa Miso (in miso soup)
Collard & Beet Greens in Coconut Milk (sa gata)
For LP-18, I offer another variation to an oft used theme of dressing vegetables with the 'filipino salsa' of onions, tomatoes, lemon and fish sauce.
It's grilling time again here in the U.S., and with the past three day holiday, our grill has been on overdrive. This is part of what we cooked on the grill for Memorial Day. Again as with may dishes in our kitchen, it is a cross between the usual grilled vegetable that is dressed with a type of Italian style dressing and the Filipino way of tomatoes, onions, lemon and fish sauce. It is a variation from the traditional Eggplant Salad.
This dish would be perfect for a large crowd and can be cooked ahead of time as the marinating process adds so much to the flavor.
Start by grilling eggplants (I used the large globe eggplants that are more common in the grocery stores) which have been cut into 1/4 inch thick rounds and drizzled with olive oil, salt, & pepper. Do the same to zucchini squashes or yellow squashes that have been halved or quartered lengthwise.
On a platter with sides or bowl, layer first the grilled eggplant slices, then the grilled squash. To these layers add a layer each of tomatoes and sweet onions, then sprinkle with chopped cilantro.
In a separate bowl or cup, mix together equal amounts of soy sauce, balsamic vinegar, and olive oil until well blended and pour over the vegetable layers. Let stand at room temperature for at least 30 minutes or refrigerated for as much as overnight.
I purposely didn't add any measurements for the dressing as this will depend on how much vegetables you are using. For a small platter, you can start with two tablespoons each, for instance and just increase the proportions according to your needs.
For the roundup of LP18 participants, visit Toni's Wifely Steps.

This is round two of beets in the garden and the last (probably) of outdoor grilling. Nothing beats grilling steaks so when we had a few days of unseasonably warm weather recently, we decided to grill one last time.
One of our favorite marinades for steak is bottled teriyaki sauce, balsamic vinegar, olive oil, crushed garlic, cracked black pepper and herbs. We still had some fresh rosemary and thyme in the garden so that's what we used this time around. When we had plenty of basil, we used basil; but one night of freezing weather pretty much burned all the basil left.
These were New York Strip Steaks grilled medium for hubby and I but well done for the princesses.
It is definitely soup weather time again, and we'll have plenty of those coming up. This is our last taste of summer.
maybe...... ;-)
For Beet recipes:
Boiled Beets
Beet Greens with Garlic

I had taken out a whole chicken to defrost one day but had no idea what to make with it. I just figured I will get inspired by the time the chicken thawed out. And indeed, I was; thanks in part to Jade's recent obsession with Persian Food. She has taken a particular liking to koobideh, I think because she likes how the word rolls off her tongue but she also just likes the flavor of grilled lamb. I didn't have lamb on hand though, all I had was this chicken staring at be begging to be cooked in any other way other than adobo and fried. So we decided to grill it and also try thi Joojeh Kabab recipe. We made a few modifications though since as usual, we were pressed for time and didn't have time to marinade the full 24-hours. Here is our method for joojeh kabab, which turned out wonderfully, by the way.
INGREDIENTS:
1 whole chicken cut into pieces
1/4 cup olive oil
2 large onions, grated (we processed ours in the automatic chopper to save our eyes)
1/2 teaspoon safron
Salt & Pepper
After washing and cutting the chicken, I placed them in a large pot and added the rest of the ingredients. Since I was again doing my last to the minute cooking and didn't have time for the 24 marinade or slow roasting on the grill, I decided to try the quick grill method. Pre-cook the chicken in the marinade. Bring the chicken and marinade to a boil while preparing the grill and lighting the charcoals. This grilling part is one we prefer not to take short cuts on. We always use charcoals instead of the electric grill. It also helps that we don't have an electric grill so we really don't have a choice but cook everything over coals ;-). By the time the grill is cleaned and the charcoals are ready for cooking, the chicken should be cooked through. Grill the chicken just until they are browned, marinating with some of the cooking juices. I reserved about a cup of the cooking liquid which served as gravy over the chicken during the meal.
These were served with grilled tomatoes, onions and jalapeno peppers and buttered rice (Recipe follows).

Although it has been a relatively mild winter for us, we are already hankering for spring and summer to come around again. Our garden is waiting to be tilled and the grill is ready for it's cover to be lifted. WE are ready to start cooking outside again...the scent of burning coals and fresh herbs are tickling our noses. WE CAN'T WAIT FOR SUNSHINE!
Something for breakfast will be posted this weekend for Lasang Pinoy 7. Lets get get cooking for breakfast!
I saw this recipe for bulgogi which is Korean barbeque on PurpleGirl's blog sometime ago and I've been wanting to try it for sometime, but haven't found the right cut of meat until recently. However, by this time, the weather has turned cool, and it just is not conducive to cooking outside anymore. Plus, as usual, I didn't have a whole lot of time to get dinner on the table, so this is my version of the Koreal style barbecue, stovetop. I used a pressure cooker to hasten the cooking time even more. 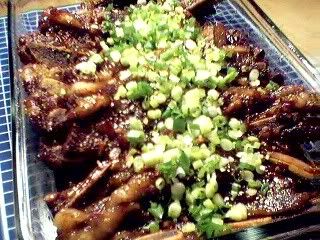
You will need, 2 pounds of beef short ribs, cut for kalbi which is beef short rib sliced across the ribs, about a fourth of an inch thick. A bit unusual to find in the regular grocery store, but I lucked out and found a pack. First, I rinsed the slices to remove any grit from the sawing of the bones, and spread the slices on a baking sheet. Take 4 tablespoons of brown sugar and sprinkle or rub onto the slices and marinade for 10 minutes while getting the rest of the ingredients ready. Mix in a small bowl:
4 garlic cloves crushed and minced
4 tablespoons soy sauce
2 tablespoons sesame oil
1/4 cup rice vinegar
1/2 teaspoon red pepper flakes
1 cup water
Layer the ribs in the pressure cooker and pour the ingredients above over the meat. Seal, and pressure cook for 35 minutes. After the meat is tender but not falling apart, lay them on an ovenproof dish and put in a 400 degree F oven to caramelize, about 15 to 20 minutes. In the meantime, take the remaining liquid in the pressure cooker and cook additionally until it is reduced to half and has thickened. Remove the pan from the oven and pour the sauce over, and sprinkle with chopped green onions. Serve over steamed rice.


